How to Ferment Your Own Kimchi: A Foolproof 7-Day Plan
Making your own fermented kimchi at home sounds scary. It’s not. You just need a week, some cabbage, and the willingness to let things get a little funky in your kitchen. The smell will make your roommates ask questions. The taste will make them forgive you.
I’ve been fermenting my own kimchi for three years now. Started because the store-bought stuff costs $12 a jar and disappears in two days at my house. Now I keep three jars rotating in my fridge at all times. My Korean neighbor once tasted mine and nodded. That’s the highest compliment I’ve ever received.

Why This Kimchi Fermentation Recipe Wins
This foolproof 7-day plan works because it breaks down the fermentation process into manageable chunks. No guessing. No weird science experiments gone wrong.
The timing gives you proper fermentation without that overly sour punch that makes people wince. You get the good bacteria doing their thing at the right pace. The result? Crispy, tangy kimchi that actually tastes like what you’d find in a Korean restaurant.
Plus, fermenting your own kimchi means you control the heat level, the funk, and the crunch. Store-bought versions sit on shelves for months. Yours will be fresh and loaded with probiotics that help your gut.
Ingredients You’ll Need to Ferment Kimchi
Here’s what goes into your kimchi fermentation project:
For the Cabbage Base
- 1 large napa cabbage (about 2 pounds) – The foundation. Napa cabbage has those perfect crispy leaves that hold up during fermentation.
- 1/4 cup sea salt – Pulls moisture out and starts the fermentation. Regular table salt has additives that mess things up.

For the Kimchi Paste
- 1 tablespoon grated ginger – Adds that warm, spicy kick.
- 4 cloves garlic, minced – Because kimchi without garlic isn’t kimchi.
- 1 teaspoon sugar – Feeds the good bacteria. They need food to work.
- 3 tablespoons fish sauce – The umami bomb. Use soy sauce if you’re vegetarian.
- 1-5 tablespoons Korean red pepper flakes (gochugaru) – Controls your heat level. Start low if you’re nervous.
- 4 green onions, chopped – Fresh flavor that cuts through the funk.
- 1 carrot, julienned – Adds sweetness and color.
Equipment for Your 7-Day Kimchi Plan
Don’t overthink the gear. Here’s what makes this kimchi plan work:
- Large mixing bowl
- Clean glass jar (2-quart size works great)
- Gloves (trust me on this – the pepper flakes will make your hands burn)
- Weight or small plate to keep cabbage submerged

How I Make It: The 7-Day Fermentation Plan
Day 1: Prep and Salt Your Kimchi
Cut your napa cabbage lengthwise into quarters. Remove the core. Chop into 2-inch pieces.
Put the cabbage in your big bowl. Sprinkle that sea salt all over it. Use your hands to massage the salt into every leaf. It feels weird but it works.
Fill the bowl with cold water until the cabbage is covered. Put a plate on top to keep it submerged. Let it sit for 2 hours at room temperature.
Day 1 Evening: Rinse and Drain
After 2 hours, drain your cabbage. Rinse it three times in cold water. You’re washing away excess salt. Taste a piece – it should be pleasantly salty, not mouth-puckering.
Squeeze out the water gently. Set it aside to drain completely.
Day 1 Night: Make the Fermentation Paste and Mix
Put on those gloves. Mix your ginger, garlic, sugar, fish sauce, and Korean red pepper flakes in a bowl. It should look like a thick red paste.
Add your green onions and carrot to the paste. Mix it up.
Now grab that drained cabbage. Add the paste to it. Get your hands in there and massage everything together. Every leaf should have that red coating.

Days 2-3: Pack and Start Kimchi Fermentation
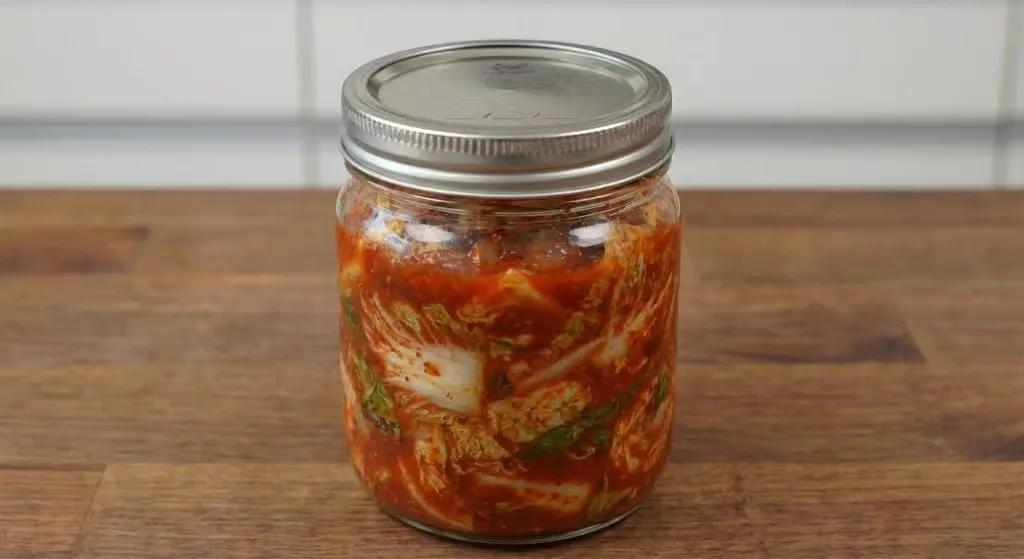
Pack your kimchi into that clean glass jar. Push it down hard. You want to eliminate air pockets. The liquid from the cabbage should rise up and cover everything.
Leave about 2 inches of space at the top. Fermentation creates gases and you don’t want kimchi exploding everywhere. (It happens. My kitchen ceiling can confirm.)
Close the lid loosely. Keep the jar at room temperature, away from direct sunlight. Check it once a day.
Days 4-5: Active Fermentation Phase
This is where fermenting your own kimchi gets interesting. You’ll see bubbles. The jar might smell funky. That’s good.
Open the jar once a day to let gases escape. Press the kimchi down if it’s risen above the liquid. Taste a small piece on day 4. It should start tasting tangy.
Days 6-7: Finishing Your Homemade Kimchi
By day 6, your kimchi should taste noticeably sour and funky. The flavors will have deepened. The cabbage stays crispy but the bite is different – fermented, alive.
On day 7, taste it. If you like where it’s at, move the jar to your fridge. Cold temperatures slow fermentation way down. If you want more tang, let it go another day or two.

Kimchi Fermentation Tips That Make a Difference
Temperature controls everything. Warmer rooms (70-75°F) ferment faster. Cooler spots slow things down. Find your sweet spot.
Don’t skip the gloves when mixing. I learned this the hard way after rubbing my eye during the process. Not fun.
Korean red pepper flakes (gochugaru) aren’t the same as regular red pepper flakes. They’re coarser and have a different flavor. Order them online if your grocery store doesn’t carry them. Regular crushed red pepper will make it too spicy and wrong-tasting.
Keep everything submerged under the liquid. Exposed cabbage can get moldy. If a piece floats up, just push it back down or eat it.
The white film that sometimes appears? Usually it’s just yeast. Skim it off if you see it. The kimchi underneath is fine.
Easy Kimchi Variations for Your Plan
This foolproof plan works as a base for different styles.
Quick Fermented Kimchi
Cut everything smaller. Skip day 1’s long salt soak and just salt for 30 minutes. You’ll have kimchi ready in 3-4 days instead of 7.
White Kimchi Variation
Leave out the Korean red pepper flakes entirely. Add extra ginger and a sliced pear for sweetness. Great for people who can’t handle heat.
Vegan Kimchi Version
Swap fish sauce for soy sauce or coconut aminos. Add a piece of kombu (dried kelp) for that umami depth.
Extra Veggie Fermentation Mix
Throw in daikon radish, Korean radish, or even some sliced apple. The fermentation process works the same.
How to Store Your Fermented Kimchi
Once your kimchi hits the fridge, it keeps for months. Seriously. I’ve had jars last 6 months and get better with age.
The flavor will continue developing even in the cold. Month-old kimchi tastes different from week-old kimchi. Both are good, just different.
Keep it in a sealed container because that smell is powerful. Your roommates will thank you.
For cooking, you don’t need to reheat kimchi most of the time. Use it cold on rice, in wraps, with eggs. But if you’re making kimchi fried rice or kimchi stew, the heat actually mellows the funk and brings out sweeter notes.
Frequently Asked Questions About Fermenting Kimchi
How do I know if my fermented kimchi has gone bad?
Smell it. Kimchi should smell sour and funky but not rotten. If it smells like actual garbage or has fuzzy mold (different from white yeast film), toss it. A little surface yeast is normal and safe to skim off.
Can I ferment kimchi in a plastic container?
Glass is better. Plastic can absorb odors and the acids from fermentation might react with certain plastics. Go with glass jars or food-grade ceramic containers.
My kimchi isn’t bubbling during fermentation. Did I mess up?
Not necessarily. Fermentation speed varies based on temperature and how much good bacteria got going. Give it more time. If it’s cold in your kitchen, it’ll take longer. As long as it starts tasting tangy, you’re good.
Why is my kimchi too salty?
You didn’t rinse the cabbage enough after the initial salting. Next time, rinse it more thoroughly and taste-test before adding the paste. You can’t really fix oversalted kimchi, but you can dilute it by mixing with fresh cabbage.
Can I use regular cabbage instead of napa for this plan?
You can, but the texture will be different. Regular green cabbage is tougher and doesn’t ferment quite the same way. The result is still edible but not traditional kimchi. Stick with napa for this 7-day plan.
My Kimchi Fermentation Story
The first time I tried fermenting my own kimchi, I messed up the salt ratio. Used way too much. My first taste made me pucker like I’d bitten into a lemon.
I almost threw the whole batch out. But something told me to wait. I shoved that jar in the back of my fridge and forgot about it for three weeks.
When I found it again, I tried a bite expecting the worst. The fermentation had somehow balanced everything out. The salt mellowed. The flavors deepened. It tasted incredible.
That batch taught me that kimchi fermentation is forgiving. Even when you think you’ve ruined it, time and bacteria can work miracles. Though these days I measure my salt properly and don’t rely on miracles.
Final Note
Making kimchi connects you to something old. Every jar you ferment joins this long chain of people who’ve been doing this for centuries.
Your first batch might not be perfect. Mine wasn’t. But by batch three or four, you’ll have it down. You’ll know what good fermentation smells like, feels like, tastes like.
Start your foolproof 7-day plan this weekend. Set a reminder on your phone for each step. Take notes on what works. By next month, you’ll be that person who always has homemade kimchi in the fridge.
And maybe, like my grandmother, you’ll find yourself pressing your ear against the jar sometimes. Just to hear it work.
*This post may contain affiliate links which means I may earn commissions for purchases made through links at no extra cost to you. See https://asianfoodsdaily.com/disclaimer/* for more infomation
Post your Comment
0 Comments
No comments yet. Be the first to share your thoughts!