How to Make Perfect Chilli Paneer at Home
If you love that sticky, spicy, crispy Chilli Paneer from your local Indo-Chinese spot, you need this recipe. I’m going to show you exactly how to make perfect Chilli Paneer at home that tastes just like the restaurant version, but fresher.

Why This Recipe Wins
This isn’t just another complicated recipe. It’s my go-to method because it actually works every time.
Many homemade versions end up with soggy paneer or a sauce that’s too runny. This recipe fixes those problems. We use a double-fry method for the paneer. It sounds fancy, but it just means frying it twice. That’s the secret to getting that super crispy exterior that stays crunchy even after it hits the sauce.
The sauce balance is also key. It’s the right mix of tangy, spicy, and slightly sweet. It coats the paneer perfectly without drowning it. This is the easy chilli paneer recipe at home you will keep coming back to.
Ingredients for Restaurant Style Chilli Paneer
You don’t need hard-to-find ingredients for restaurant style chilli paneer. You probably have most of these already.
For the Crispy Paneer:
- Paneer (Indian Cottage Cheese): The star of the show. Use a firm block and cut it into cubes.
- Cornstarch (Cornflour): This is crucial for the crispy coating.
- All-Purpose Flour (Maida): Mixed with cornstarch, it creates a batter that sticks.
- Ginger and Garlic Paste: Adds flavor right onto the paneer cubes.
- Salt and Black Pepper: Simple seasoning for the batter.
- Oil: For deep frying or shallow frying.

For the Chilli Sauce:
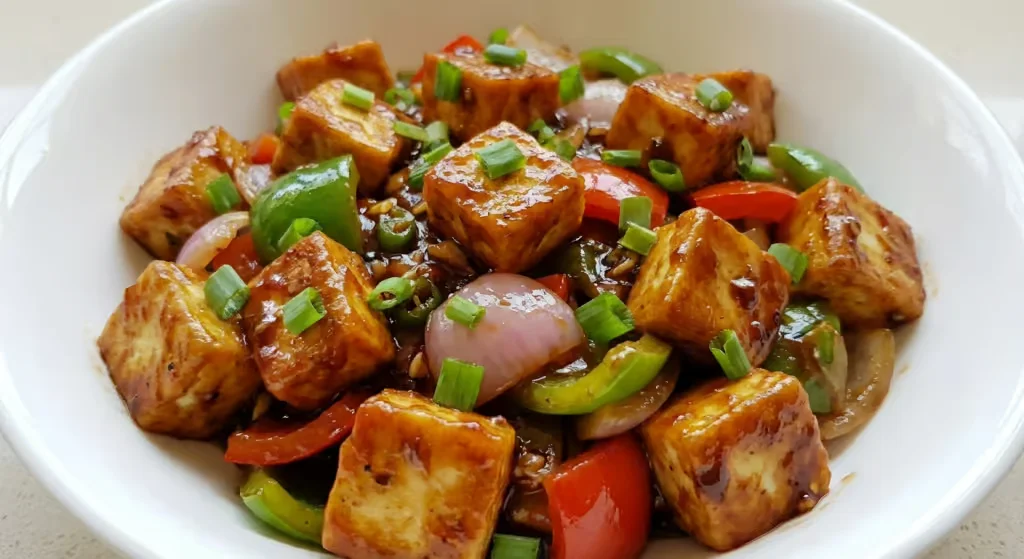
- Onions and Bell Peppers (Capsicum): Cut them into squares. They add crunch and color.
- Green Chillies: Fresh heat. Add more or less depending on your spice tolerance.
- Ginger and Garlic: Finely chopped. The foundation of great Indo-Chinese flavor.
- Soy Sauce: Dark soy sauce gives the best color and savory depth.
- Chilli Sauce: Green or red chilli sauce works. It adds tang and heat.
- Vinegar: Just a splash for acidity to balance the flavors.
- Tomato Ketchup: Sounds strange, but a little bit adds necessary sweetness and color.
- Cornstarch Slurry: Mix cornstarch with cold water. This thickens the gravy.
- Spring Onions: The green parts are essential for garnish at the end.
Equipment You’ll Need
You really don’t need much. A good sharp knife for chopping veggies is important. You’ll need a mixing bowl for the batter. Most importantly, grab a wide pan or wok. A wok is great because you have room to toss everything together without spilling.
My Guide on How to Make Perfect Chilli Paneer at Home

Here is my step-by-step guide on how to make perfect chilli paneer. It moves fast once you start cooking, so chop everything beforehand.
Step 1: Prepare the Paneer
Cut your block of paneer into bite-sized cubes. In a bowl, mix the cornstarch, flour, ginger-garlic paste, salt, pepper, and a little water. You want a thick batter that coats a spoon. Toss the paneer cubes gently in this batter.
Step 2: The Crispy Fry
Heat oil in your pan. When it’s hot, carefully drop in the coated paneer pieces. Don’t overcrowd the pan, or they will stick together. Fry them until they are light gold. Remove them and let them drain on a paper towel.
Here is the trick: Turn up the heat under the oil. Once it’s super hot, put the paneer back in for just 30 seconds. This second fry makes them incredibly crispy.
Step 3: Aromatics First
Remove most of the oil from the pan, leaving about two tablespoons. Add the chopped ginger, garlic, and green chillies. Stir them quickly on high heat for a few seconds until they smell great.
Step 4: Veggie Crunch
Toss in the cubed onions and bell peppers. Stir-fry them on high heat for a minute or two. You want them slightly blistered but still crunchy. Don’t cook them until they are soft.

Step 5: Build the Sauce
Lower the heat slightly. Pour in the soy sauce, chilli sauce, vinegar, and ketchup. Give it a quick mix.
Step 6: Thicken it Up
Give your cornstarch slurry a stir again (the starch settles at the bottom). Pour it into the bubbling sauce. Keep stirring. The sauce will turn glossy and thick almost immediately. If you want more gravy, add a splash of hot water here.
Step 7: The Final Toss
Add your crispy fried paneer cubes to the pan. Toss everything together quickly so the paneer is coated in that sticky sauce. Turn off the heat. Throw in a generous handful of chopped spring onions. Serve it immediately while it’s hot and crispy.
Tips That Make a Difference
Getting that perfect texture can be tricky. Here are a few things I’ve learned along the way.
- Don’t Overcook the Veggies: The onions and peppers should snap when you bite them. Soggy vegetables ruin the texture contrast. High heat is your friend here.
- The Slurry Secret: Always mix cornstarch with cold water before adding it to hot liquid. If you add straight powder to hot sauce, it clumps up instantly.
- Prep is Everything: Indo-Chinese cooking happens very fast. Have your veggies chopped, sauces measured, and slurry mixed before you turn on the stove.
- Fresh Paneer: Use the freshest paneer you can find. If it feels hard, soak the block in warm water for 20 minutes before cutting it. Soft paneer makes a huge difference.
Easy Variations
This recipe is flexible. You can easily adapt this Indo-Chinese chilli paneer recipe to what you like.
- Make it Dry: If you want a vegetarian chilli paneer starter, just use less water in the sauce stage. The sauce should just glaze the paneer tightly.
- Make it Gravy: For crispy paneer chilli gravy to eat with fried rice or noodles, double the amount of water and cornstarch slurry.
- Extra Spicy: Add a teaspoon of red chilli paste or Schezwan sauce along with the other sauces for a deeper kick.
- Vegan Option: Swap the paneer for firm tofu. Press the water out of the tofu first so it gets crispy.
Storage and Reheating Your Indo-Chinese Chilli Paneer
Chilli paneer is best eaten right away. The paneer will eventually get soft in the sauce.
If you have leftovers, store them in an airtight container in the fridge for up to two days.
To reheat, don’t use the microwave. It makes the paneer rubbery. Reheat it in a pan on the stovetop over medium heat until it’s heated through. You might need to add a splash of water to loosen the sauce. It won’t be as crispy as fresh, but it still tastes good.
FAQs
1. Why is my paneer chewy or rubbery? This usually happens if you overcook the paneer during the frying stage, or if you reheat it in the microwave. Fry just until golden, and always reheat on the stovetop.
2. Can I bake or air-fry the paneer instead of deep frying? Yes, you can. It makes the dish lighter. Spray the battered paneer with oil and air fry at 180°C (350°F) for about 10-12 minutes, flipping halfway. It won’t be quite as shatteringly crispy as deep frying, but it works well for a quick chilli paneer cooking guide.
3. How do I get that dark restaurant color? The secret is dark soy sauce. Regular soy sauce is saltier and lighter in color. Dark soy sauce adds that rich, deep brown hue and a slightly thicker texture.
4. Is chilli paneer gluten-free? Not naturally. Soy sauce usually contains wheat, and we use all-purpose flour in the batter. To make it gluten-free, use tamari instead of soy sauce, and use rice flour or just cornstarch for the batter.
**5. Can I make this ahead of time? You can prep the elements ahead. Chop the vegetables and mix the sauces in a jar earlier in the day. You can even fry the paneer once and let it cool. When you are ready to eat, do the second fry on the paneer and make the sauce. Don’t combine the paneer and sauce until just before serving.
Final Note
I remember the first time I tried making this. I didn’t use the double-fry method, and my paneer got soggy the second it touched the sauce. It still tasted okay, but the texture was all wrong. It took a few tries and talking to a friend who worked in a kitchen to learn about frying it twice. That one change made a massive difference. Now, whenever I crave that crunch, I know exactly what to do.
I hope this guide helps you master how to make perfect chilli paneer at home. Enjoy the cooking process!
This post may contain affiliate links which means I may earn commissions for purchases made through links at no extra cost to you.
*See https://asianfoodsdaily.com/disclaimer/* for more infomation
Post your Comment
0 Comments
No comments yet. Be the first to share your thoughts!