How to Make Korean Jangjorim (Easy Soy-Braised Beef & Eggs)

Jangjorim (장조림) is the banchan that turns a bowl of plain rice into dinner without you doing any extra work. I’m talking tender, shredded beef drenched in a sweet-salty soy glaze, eggs so deeply marbled they look stained glass, and a sauce you’ll drizzle on literally everything. This is one of those Korean side dishes that sits in your fridge all week and somehow gets better every single day.
I first made this because I kept reading about mitbanchan — the “fridge banchan” that forms the backbone of everyday Korean home cooking. The idea was simple: cook once, eat well all week. Jangjorim is the classic example. It’s been packed into Korean children’s lunchboxes for generations, and once you’ve kept a jar of it in your fridge, you’ll understand exactly why.
Let me walk you through the version I’ve landed on after quite a few batches — including the batch where I added soy sauce too early and the beef turned into shoe leather. (There’s a reason I test these things before posting them.)
What Is Jangjorim?
Jangjorim (장조림) literally translates to “soy sauce braised” — jang (장) means sauce or soy sauce, and jorim (조림) is the Korean cooking technique of simmering food in a seasoned liquid until it absorbs flavor and the liquid reduces to a glaze. It’s the same method behind japchae’s deeply seasoned beef, and behind almost every braised Korean dish you’ve had.
The full name is sogogi jangjorim (소고기 장조림) when made with beef. Traditionally it used lean, inexpensive cuts — back when beef was a luxury in Korea, this was a smart way to make a small amount of meat stretch across a whole family’s rice bowls for the week. Now it’s made simply because it tastes fantastic.
What makes it different from other braises is the braising liquid itself: it becomes a concentrated, intensely savory-sweet sauce that you eat with everything. A spoonful over rice is the most common move, but I’ve stirred it into noodle bowls, fried rice, and even used it to season vegetables.
Why This Recipe Works (And Where Others Go Wrong)
Here’s the thing about jangjorim that most recipes don’t explain clearly: the order you add the soy sauce completely determines the texture of the beef.
If you braise the beef in soy sauce from the very start, the salt tightens the muscle fibers immediately. The result is tough, chewy beef that no amount of cooking time will fix. The fix is straightforward — cook the beef first in plain aromatic broth until it’s tender, then add the soy sauce to season and reduce. This is not optional, and it took me a full batch to figure out why my first attempt was so unpleasant.
✓ Asha’s Rule: Plain broth first, soy sauce second. Always. No shortcuts here.
The second thing that matters: the cold soak. Submerging the beef in cold water for 30 minutes before you cook it draws out the myoglobin — the proteins that make raw meat look dark red. Skip this and you’ll get a murky, grey-tinted broth. Do it and you get a clean, clear braising liquid that becomes a beautiful sauce.
And finally: don’t add the eggs too early. They need 25–30 minutes in the soy sauce to absorb flavor and develop those gorgeous marbled patterns, but any longer and the whites get rubbery. Timing matters.
Ingredients You’ll Need
Everything here is findable at a standard grocery store. The one slightly specialist item — shishito peppers — is increasingly common at mainstream supermarkets, but I’ve given a sub if you can’t find them.
For the beef: 500g (about 1.1 lb) beef brisket, eye of round, or shank · 1 small onion, halved · 4 garlic cloves · 3 slices fresh ginger · 1 tsp whole black peppercorns · 2 dried bay leaves · 8 cups cold water
For the braise: 6 tbsp low-sodium soy sauce (preferred — regular soy can tip the sauce too salty as it reduces) · 2 tbsp mirin · 1.5 tbsp sugar · 10–12 shishito peppers, optional · 1 piece dried kelp / kombu, approx. 10cm, optional
For the eggs: 6 large eggs
On the beef cut: Eye of round is the classic choice — lean, firm, and it shreds cleanly into those satisfying strips. Brisket has more fat, which makes the sauce silkier. Shank is the most flavourful but takes longer to become tender. All three work. Don’t use ribeye or sirloin — they’re too expensive for this, and the delicate fat doesn’t hold up to long braising the way tougher cuts do.
⚠️ Soy sauce note: If you’re using regular (full-sodium) soy sauce, start with 4 tablespoons and taste before adding more. As the sauce reduces, the salt concentrates fast. I use Kikkoman low-sodium — it gives you more control.
What about shishito peppers? Traditional Korean jangjorim includes kkwari gochu (꽈리고추), which are mild Korean green chili peppers. Shishito peppers are the easiest substitute — same mild heat, similar texture. They add a little brightness to cut through the rich sauce. If you can’t find either, just skip them. This dish doesn’t need them, but it’s better with them.
How to Make Jangjorim — Step by Step
Prep Time: 15 min · Cook Time: 90 min · Total: ~105 min · Serves: 4–6 · Cuisine: Korean · Course: Banchan
Ingredients
- 500g beef brisket or eye of round, cut into 2–3 inch pieces
- 8 cups cold water
- 1 small onion, halved
- 4 garlic cloves, peeled
- 3 slices fresh ginger
- 1 tsp whole black peppercorns
- 2 dried bay leaves
- 6 large eggs
- 6 tbsp low-sodium soy sauce
- 2 tbsp mirin
- 1.5 tbsp sugar
- 10–12 shishito peppers (optional)
- 1 piece dried kelp/kombu, ~10cm (optional, for extra umami)
Instructions
Step 1: Place the beef in
Cold soak the beef. Place the beef in a bowl, cover with cold water, and soak for 30 minutes. This pulls out excess myoglobin and gives you a cleaner broth. Drain and rinse.
Step 2: Add the beef, 8
Start the aromatic broth. Add the beef, 8 cups fresh cold water, onion, garlic, ginger, peppercorns, and bay leaves to a medium-large pot. Bring to a boil over medium-high heat. Skim off any grey foam that rises — this is normal. Give it 2–3 minutes of skimming. A fine mesh strainer is useful here if you want a very clean broth.
Step 3: Reduce to a steady
First braise — no soy yet. Reduce to a steady simmer. Cook uncovered for 50–60 minutes until the beef is cooked through and just beginning to get tender. It shouldn’t be fall-apart yet — it’s going back in the pot. Do not add soy sauce at this stage.
Step 4: While the beef braises
Hard-boil the eggs. While the beef braises, bring a separate small pot of water to a boil. Gently lower in the eggs and cook for exactly 8 minutes. Transfer immediately to an ice bath. Once cool enough to handle, peel them.
Step 5: Carefully ladle out and
Reduce the broth and season. Carefully ladle out and discard (or save for soup) about 4 cups of the beef broth, leaving roughly 3–4 cups in the pot with the beef. Add soy sauce, mirin, and sugar. Stir to combine. Taste the broth — it should be pleasantly salty and slightly sweet. Adjust if needed.
Step 6: Add the peeled eggs
Add the eggs and reduce. Add the peeled eggs and kelp (if using) to the pot. Simmer uncovered over medium-low heat for 25–30 minutes, turning the eggs every 8–10 minutes so they colour evenly on all sides. Add shishito peppers in the last 10 minutes — they only need a short braise or they turn mushy.
Step 7: Remove the beef from
Shred the beef. Remove the beef from the pot. Using two forks (or your fingers once it’s cool enough), tear the beef into bite-sized strips — with the grain, not against. This gives you those satisfying rustic shreds rather than chunks.
Step 8: Return the shredded beef
Taste and finish. Return the shredded beef to the pot. Give everything a final taste. More soy sauce if it needs salt, a pinch more sugar if it’s too sharp. Let the whole pot cool to room temperature before transferring to a glass container.
Step 9: Refrigerate in an airtight
Store. Refrigerate in an airtight container with enough sauce to cover. Keeps for up to 7 days. Taste on day two — it’ll be noticeably better.
Notes
- No mirin? Use 2 tbsp dry sherry or 1 tbsp rice wine vinegar + 1 tsp sugar. Don’t skip something sweet entirely — it balances the soy.
- Quail eggs: Great sub for regular eggs. Hard-boil for 4 minutes. They absorb the soy glaze faster and look beautiful.
- Freezing: Freeze the beef without eggs (eggs don’t freeze well — they turn rubbery). Keeps 3 months. Thaw overnight in the fridge and reheat gently. A good airtight glass container makes all the difference here.
- The leftover sauce: Don’t throw it away. Use it as a stir-fry seasoning, a fried rice base, or thin it with a splash of water as a dipping sauce.
- Instant Pot version: Cook beef + aromatics on high pressure for 25 minutes, quick release. Remove 2 cups of liquid, add soy/mirin/sugar and eggs. Use sauté mode for 20 minutes to reduce and colour the eggs.
About That Braising Liquid (Don’t Waste a Drop)
The jangjorim sauce — called jangjorim ganjang — is honestly half the reason to make this recipe. After 30 minutes of reducing with the beef and eggs, it’s deeply savoury, slightly sweet, and concentrated with all the aromatics from the initial braise. It’s not just garnish — it’s infrastructure.
The classic move is a spoonful over hot steamed rice. But I’ve used it to season japchae — the soy glaze blends right into the noodle seasoning — added it to kimchi jjigae instead of plain soy sauce, and whisked it into a quick stir-fry marinade. It stays good in the fridge as long as the beef does, and you can keep using it for the entire week.
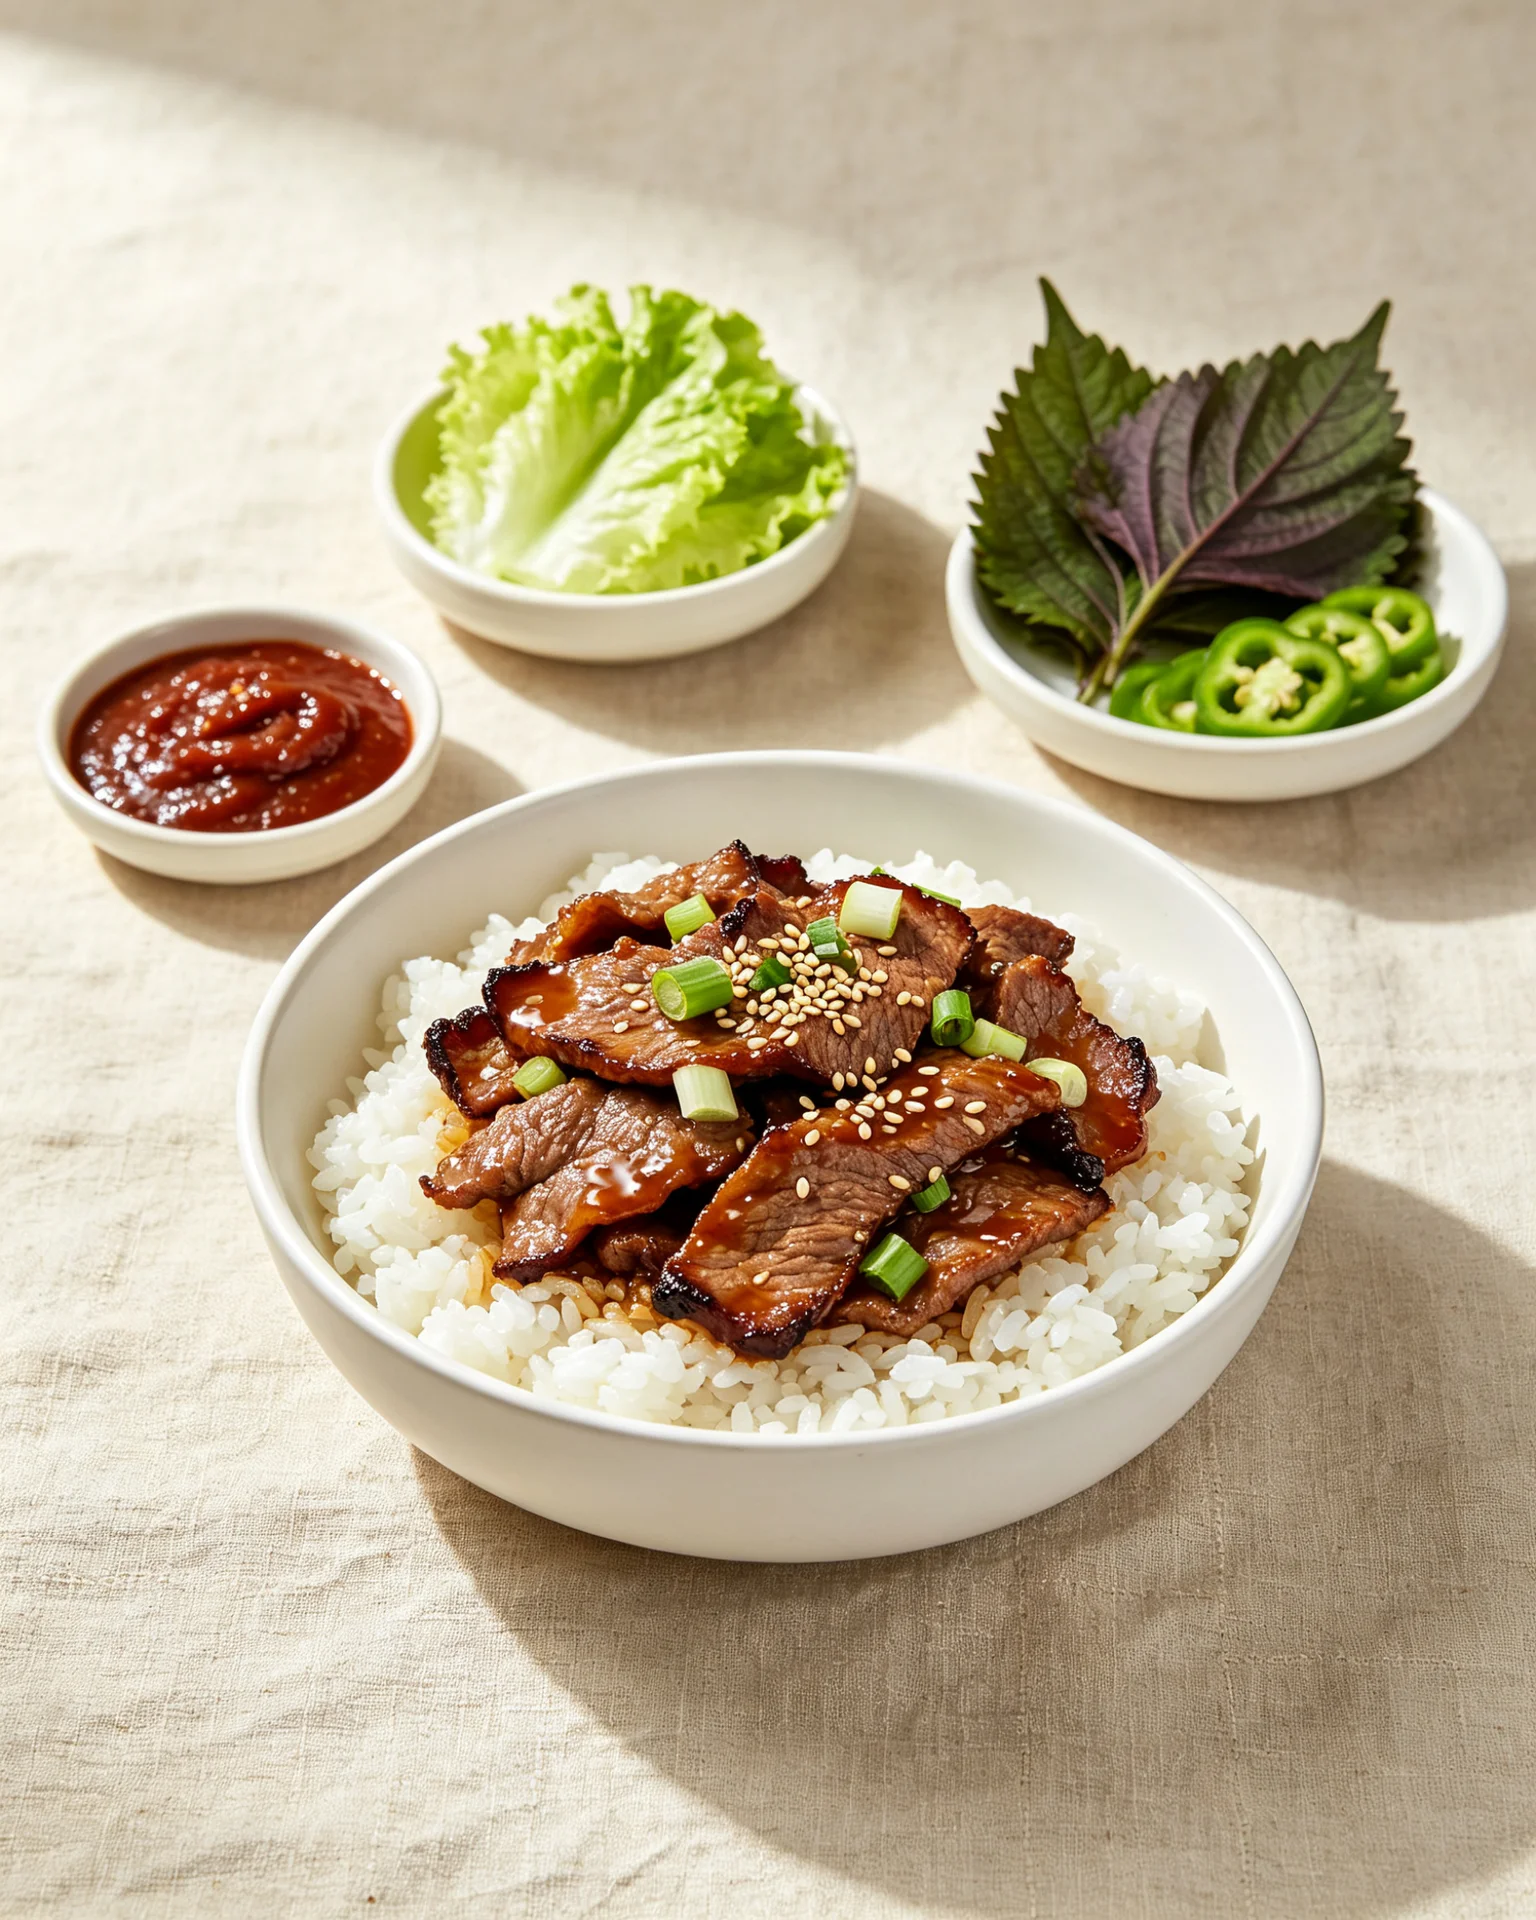
How to Serve Jangjorim
Jangjorim is a banchan — it’s meant to be eaten as a side dish alongside a main spread. Serve a small portion of beef strips, one halved egg, and enough sauce to coat everything, alongside steamed short-grain rice and a few other sides. If you want to see what a full Korean banchan spread looks like, Maangchi’s approach to building a banchan table is a good reference point — she’s the gold standard on Korean home cooking.
Rice bowl shortcut: Scoop steamed rice into a bowl. Add a few strips of jangjorim beef, one egg halved, and a generous spoonful of sauce. Done. That’s dinner in under 3 minutes after the initial cook.
Jangjorim pairs especially well with:
Kimchi — the acidity cuts through the soy richness perfectly. If you haven’t made your own yet, my 7-day kimchi fermentation guide walks through the whole process.
Kimchi jjigae — if you have aged kimchi sitting around, a bowl of kimchi soup next to jangjorim is one of the best Korean meals you can put together with pantry staples. The sour-spicy broth balances the salty-sweet beef perfectly.
Steamed greens — blanched spinach or bean sprouts dressed with a little sesame oil. They cut through the salt and add texture contrast.
Storage & Make-Ahead
Jangjorim was literally invented to be made ahead. The whole point is that you cook it once and coast through the week. Here’s what works:
Fridge: Store in an airtight glass container, submerged in enough sauce to coat. It keeps for 7 days. The flavour peaks around day 2–3.
Freezer: Freeze the beef only (skip the eggs — they don’t freeze well, turning rubbery when thawed). Portion it into meal-size bags and freeze for up to 3 months. Thaw overnight in the fridge, warm gently with a splash of water.
Reviving the sauce: If the sauce becomes very thick in the fridge (the sugar and soy concentrate significantly when cold), add 2–3 tablespoons of water to the container before warming. It’ll loosen right back up.
Re-braising to extend shelf life: If you want jangjorim to last beyond a week, bring the whole pot back to a boil for 3–4 minutes, cool, and refrigerate again. This resets the clock and it’ll keep for another 5–7 days.
Variations Worth Knowing
Pork jangjorim: Common in Korea when beef was expensive. Use pork loin or tenderloin — lean cuts that shred well. The method is identical. Cooking time is slightly shorter, around 40 minutes for the first braise. The same cook-once, eat-all-week logic is what makes Filipino chicken adobo such a natural companion recipe — different cuisine, same principle.
Spicy jangjorim: Add 2 teaspoons of gochugaru (Korean red pepper flakes) to the sauce stage. Or drop in a sliced jalapeño instead of shishitos. The heat plays well against the sweet soy base.
Garlic jangjorim: Add 8–10 whole peeled garlic cloves to the braising liquid at the soy sauce stage. They braise down to butter-soft, and they’re incredible — sweet, mellow, and completely transformed from raw garlic.
Quail egg version: Use 18–20 quail eggs instead of 6 large eggs. Hard-boil for 4 minutes, peel carefully, and proceed exactly the same way. They look beautiful and absorb the sauce faster.
Nutrition Information
Per serving (approx. 120g beef + 1 large egg + sauce). Values are estimates. Not a substitute for professional dietary advice.
| Calories | 275 kcal |
| Protein | 28 g |
| Total Fat | 13 g |
| Saturated Fat | 4.5 g |
| Carbohydrates | 10 g |
| Sugar | 7 g |
| Fiber | 0.5 g |
| Sodium | 820 mg |
| Cholesterol | 210 mg |
| Potassium | 380 mg |
| Iron | 3.2 mg |
| Calcium | 48 mg |
| Vitamin A | 180 IU |
Love Korean food?
Check out my complete guide to Korean home cooking, pantry essentials, and techniques.
Frequently Asked Questions
What cut of beef is best for jangjorim? Brisket, eye of round, and shank are all solid choices. They’re affordable, lean enough to shred cleanly, and hold up well to long braising. Avoid premium cuts like ribeye — the fat structure is wrong for this technique, and the price doesn’t make sense here.
Why add soy sauce only after the beef is cooked? Salt tightens muscle protein fibers. If you cook beef in a soy-based liquid from the start, those fibers seize up and stay tough no matter how long you braise. By cooking the beef first in plain aromatics until it’s nearly tender, then adding soy sauce, you get both the right texture and full flavor absorption.
How long does jangjorim keep in the fridge? Up to 7 days in an airtight container. The flavor actually improves significantly on day 2 and 3. If you want it to last longer, bring the whole pot back to a boil for 3–4 minutes, cool, and refrigerate — this resets the clock for another week.
Can I use quail eggs instead of regular eggs? Yes, and they’re actually excellent here. Hard-boil quail eggs for 4 minutes instead of 8. They absorb the braising sauce faster and look beautiful. Use 18–20 quail eggs in place of 6 large eggs.
What do I do with the leftover braising sauce? Don’t throw it away. It’s one of the most useful things in your fridge. Use it as a seasoning base for stir-fries, mix it into fried rice instead of plain soy sauce, thin it with a splash of water as a dipping sauce, or use it to marinate more meat before grilling.
Can I make jangjorim in an Instant Pot? Yes. Cook the beef with aromatics on high pressure for 25 minutes, quick release. Remove 2 cups of liquid, add the soy sauce, mirin, sugar, and eggs. Use sauté mode to reduce and color the eggs for about 20 minutes, turning regularly. The flavor is slightly less developed than the stovetop version, but it’s a solid weeknight shortcut.
Is jangjorim served hot or cold? Both, genuinely. Most Koreans eat it cold or at room temperature, straight from the fridge — it’s a banchan, so it’s not meant to be a piping-hot dish. But if you want it warm, a quick 45-second microwave is fine. The beef holds up either way.
You might also like: Check out our complete Korean cooking guide for more essential ingredients and techniques.
How to Make Korean Jangjorim (Easy Soy-Braised Beef & Eggs)
Korean, Low & Slow Cooking, Beef (Brisket or Shank)
PT15M
PT90M
PT105M
Nutrition Facts
Ingredients
- 500g beef brisket or eye of round, cut into 2–3 inch pieces
- 8 cups cold water
- 1 small onion, halved
- 4 garlic cloves, peeled
- 3 slices fresh ginger
- 1 tsp whole black peppercorns
- 2 dried bay leaves
- 6 large eggs
- 6 tbsp low-sodium soy sauce
- 2 tbsp mirin
- 1.5 tbsp sugar
- 10–12 shishito peppers (optional)
- 1 piece dried kelp/kombu, ~10cm (optional, for extra umami)
Instructions
- Cold soak the beef
- Start the aromatic broth
- First braise — no soy yet
- Hard-boil the eggs
- Reduce the broth and season
- Add the eggs and reduce
- Shred the beef
- Taste and finish
- Store
Did you make this recipe?
Tag @asianfoodsdaily on Instagram or leave a comment below!
About Asha
Half Asian, half African cook raised between two food-obsessed cultures. I've spent 10 years learning Asian cooking traditions through family, friends, and thousands of hours at the stove — testing every dish until it works in a standard home kitchen.
Read my full storyRelated Recipes

How to Make Korean Marinated Eggs (Mayak Eggs)

How to Make Korean Steamed Eggs (Gyeran-jjim) Like a Pro
Korean Beef Bulgogi Recipe (불고기)

How To Make Spicy Delicious Kimchi Jjim At Home

Authentic Kimchi Fried Rice Recipe (Kimchi Bokkeumbap)

Loading comments...