Sri Lankan Chicken Kottu Roti Recipe (With Homemade Godamba Roti)

There is a sound that defines Colombo at night. The metallic clang of two blades hitting a hot iron griddle in fast, rhythmic strokes. That is kottu roti being made. Every street corner shop has its own rhythm. The cook works fast: chopping, folding, scraping, chopping again. The smell of roasted spice and hot curry gravy hits you before you see the griddle. You eat it standing up, out of a piece of newspaper if you’re lucky, at 11pm after everything else is closed.
This recipe gets you as close to that as a home kitchen allows. It has two parts: the godamba roti, the specific layered flatbread that makes kottu what it is, and the chopping and frying technique that turns it into a complete meal. Both are explained in full because both are necessary. Skipping straight to a tortilla or frozen paratha works. It is not the same dish.
What is kottu roti?
Kottu roti, also spelled koththu, from the Tamil word meaning “to chop,” is a Sri Lankan street food made by chopping cooked godamba roti into small pieces on a hot iron griddle and stir-frying it with vegetables, egg, meat, and curry gravy. The dish originated in the eastern province of Sri Lanka, around Batticaloa, in the 1960s, a way for vendors to use day-old leftover roti that could not be sold whole. It became a national food, eaten across every social and ethnic background, at every hour of the night.
It is not a curry. It is not fried rice. The closest comparison in structure is pad thai, a starch base cooked fast on very high heat with protein, egg, and aromatics, but the flavour is entirely its own: roasted Sri Lankan spice, the slight chew of layered flatbread, the richness of reduced chicken curry gravy soaked into every piece.
The godamba roti is the structural foundation. Without it the dish becomes generic fried flatbread. Understanding what godamba roti is, and why it behaves differently from a regular chapati or paratha, is the most important thing to know before you start.
What is godamba roti and why does it matter?
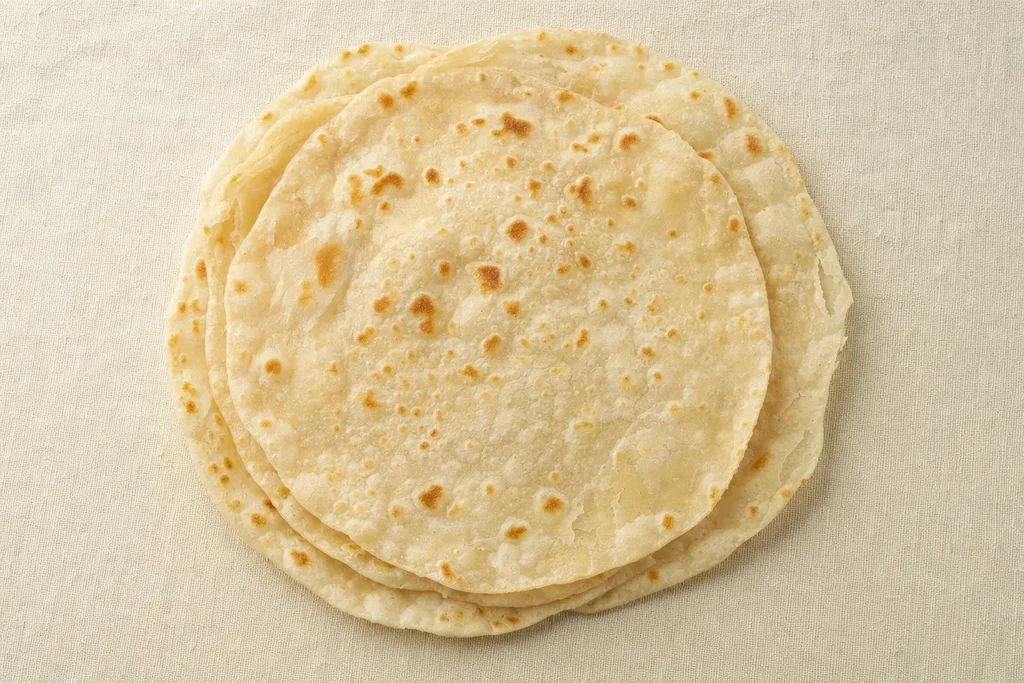
Godamba roti is a thin, slightly chewy, unleavened flatbread made from wheat flour, water, salt, and oil, stretched paper thin and cooked briefly on a hot griddle. It has no baking powder, no yeast, no lamination like a paratha. What it has is gluten development from thorough kneading, oil worked into the dough to prevent tearing during stretching, and a long rest that relaxes the gluten enough to stretch to near-transparency without springing back.
When you chop and fry godamba roti for kottu, it holds its shape in small pieces rather than breaking down to mush. It has enough chew to contrast with the soft egg and the tender chicken. Its neutral flavour carries the curry gravy without competing with it. A thick chapati or a flaky paratha behaves completely differently. It either turns to paste or stays too separate and dry.
The recipe below makes godamba roti from scratch. It takes 30 minutes including the rest. If you make a batch and refrigerate or freeze the cooked rotis, the kottu itself takes under 20 minutes. The roti is worth making. It is also a useful thing to have in the kitchen beyond kottu. It works with parippu and pol sambol as a breakfast bread in its own right.
Ingredients
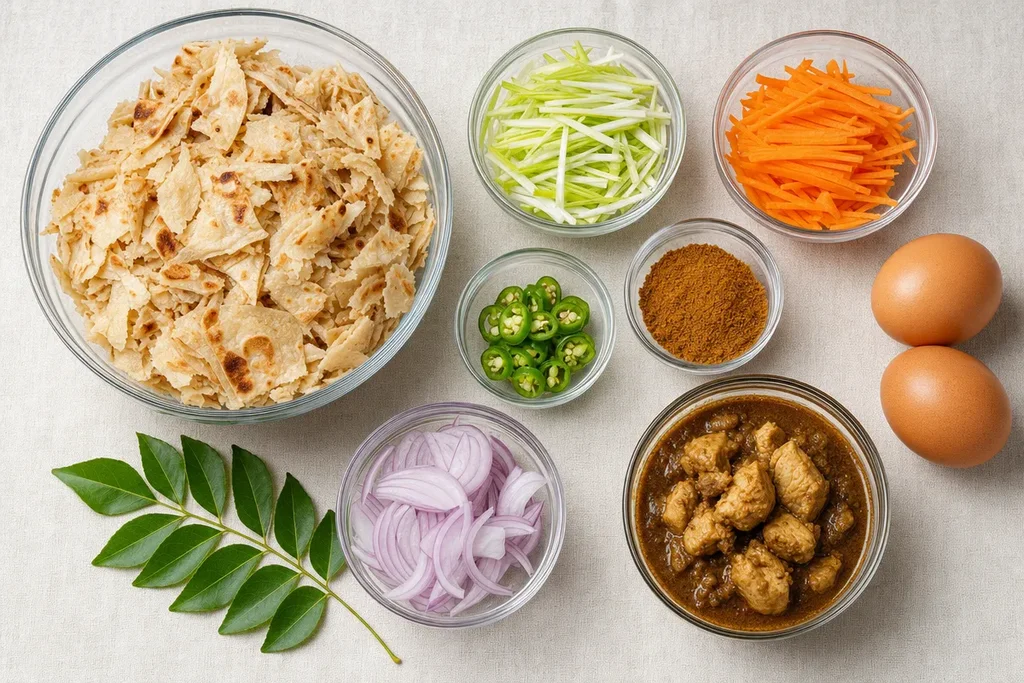
Serves 4
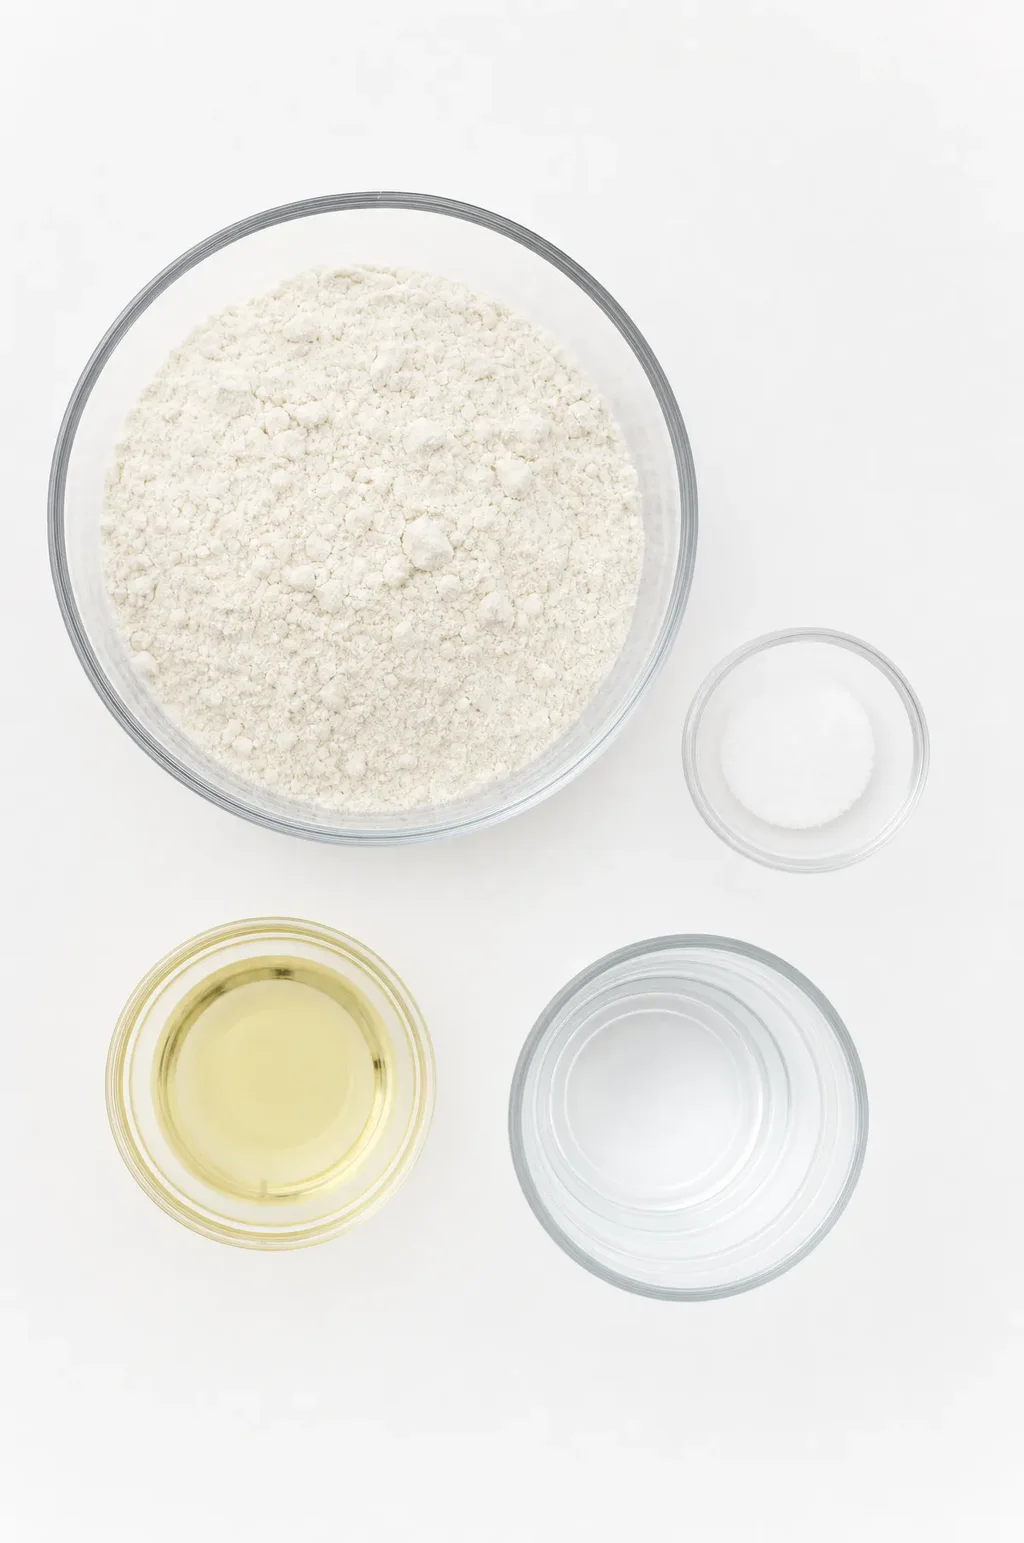
For the godamba roti (makes 6 rotis):
- 300g (2½ cups) plain flour, plus extra for dusting
- ½ tsp salt
- 180ml (¾ cup) warm water
- 3 tbsp neutral oil, plus extra for cooking and stretching
For the chicken:
- 400g (14oz) boneless chicken thighs, cut into 2cm pieces
- 1 tsp roasted Sri Lankan curry powder
- ½ tsp ground turmeric
- ½ tsp chilli powder
- ½ tsp salt
- 1 tbsp coconut oil
For the kottu:
- 3 tbsp coconut oil
- 1 tsp black mustard seeds
- 10 fresh curry leaves
- 2 shallots, finely sliced
- 4 garlic cloves, finely sliced
- 2cm piece ginger, grated
- 2 green chillies, finely sliced
- 1 medium carrot, julienned
- 2 spring onions (scallions), cut into 3cm pieces
- 1 leek, thinly sliced
- 1 tsp roasted Sri Lankan curry powder
- ½ tsp ground turmeric
- ½ tsp black pepper, freshly ground
- 3 eggs, beaten
- 4 tbsp chicken curry gravy (from cooking the chicken above, or leftover curry)
- Salt to taste
Part 1: Make the godamba roti
Step 1: Make the dough
Combine flour and salt in a large bowl. Add warm water gradually, mixing as you go, until a shaggy dough forms.
The kneading time matters. Under-kneaded dough tears when stretched. 8 minutes minimum by hand. The gluten needs to be fully developed before the rest.
Step 2: Rest the dough
Divide into 6 equal balls. Coat each ball generously in oil — use the remaining tablespoon of oil spread across all 6 balls.
The oil coating does two things: it prevents the surface from drying out during resting, and it lubricates the gluten network so the dough stretches without tearing. Do not skip the oil coat. Do not skip the rest.
Step 3: Stretch and cook
Heat a flat pan or tawa over medium-high heat with a thin film of oil.
Take one ball. Flatten it with your palm on an oiled surface. Use your fingertips to press and stretch it outward from the centre — not a rolling pin, your hands. The dough should stretch to roughly 25-30cm diameter, thin enough that you can see your hand through it in places. A few small tears are acceptable. Thick patches are not — press them thinner before cooking.
Lay the stretched roti on the hot pan. Cook for 45 seconds to 1 minute per side — just until opaque and lightly golden in spots, not crispy. The roti should remain pliable, not rigid. Remove and stack with a small amount of oil between each roti to prevent sticking.
Cool completely before cutting. Warm roti tears raggedly when chopped. Cold roti cuts cleanly.
Step 4: Cut the roti
Stack the cooled rotis and cut into strips approximately 1cm wide, then across into 1cm pieces. The pieces should be roughly thumbnail-sized.
Part 2: Cook the chicken
Step 5: Season and cook chicken
Toss chicken pieces with curry powder, turmeric, chilli powder, and salt. Heat coconut oil in a wok over high heat.
Reserve all the pan juices and any curry gravy that collects. This liquid is the flavour base for the kottu. If the pan runs dry during cooking, add 2 tablespoons of water to deglaze and collect it. You need approximately 4 tablespoons of savoury, spiced liquid for the kottu assembly. Without it the kottu is dry and the roti tastes like plain fried bread.
Remove chicken from wok and set aside.
Part 3: Make the kottu
Step 6: Build the aromatic base
In the same wok over high heat, add coconut oil. Add mustard seeds — wait for them to pop, about 20 seconds.
Add carrot, spring onions, and leek. Stir-fry for 2 minutes — the vegetables should soften slightly but retain some bite. Add curry powder, turmeric, and black pepper. Stir once and immediately move to the next step — the spices burn in 10 seconds in a hot wok.
Step 7: Add egg
Push the vegetables to the sides of the wok. Pour beaten egg into the centre.
Step 8: The chopping technique
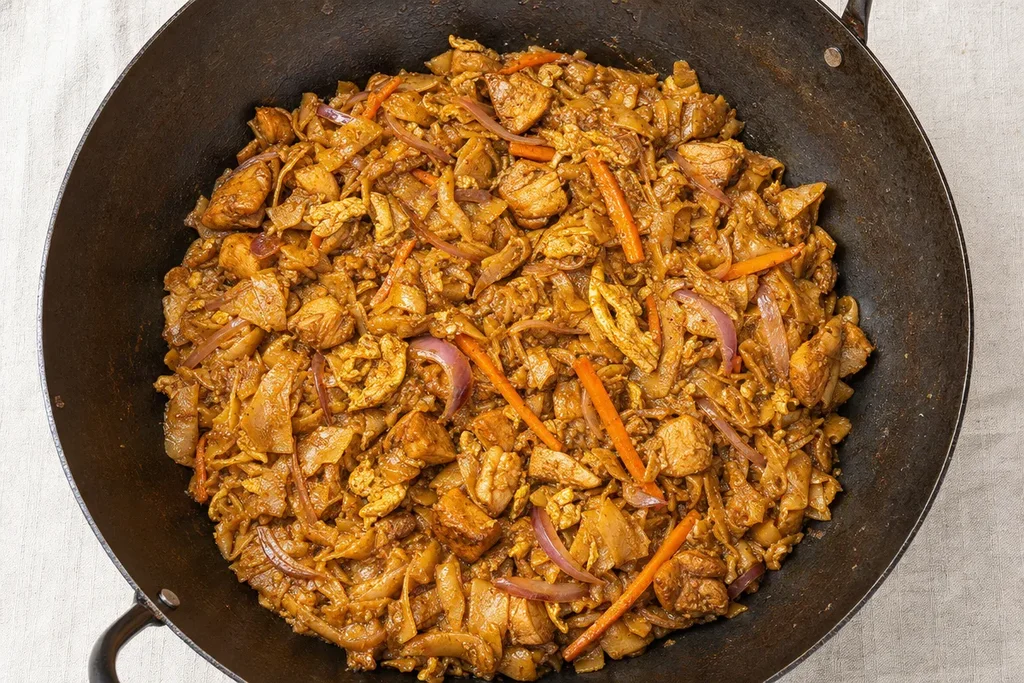
Add the chopped roti and cooked chicken to the wok. Pour the reserved curry gravy over everything.
This is where home kottu diverges from street kottu. A street vendor uses two large metal blades on a flat iron griddle, chopping in a fast rhythmic motion that breaks the roti into smaller pieces while simultaneously mixing everything. At home you do not have the equipment or the griddle space for that technique.
The home method: use two flat spatulas or two wooden spoons. Work them in opposite directions through the roti mixture — one pressing down while the other folds under. Think of it as a continuous fold-and-press rather than a stir. Every 10 seconds, chop across the mixture with the edge of one spatula, breaking up any roti pieces that are still too large.
The goal is even distribution — curry gravy coating every piece of roti, egg and chicken mixed throughout, no dry pockets of plain roti. This takes 3-4 minutes of continuous movement over high heat. Do not reduce the heat. The roti needs to fry, not steam. If the pan looks dry, add a small splash of water or curry gravy.
Step 9: Taste and finish
Taste for salt and heat. The kottu should be savoury, slightly spicy, with the roasted spice note coming through.
Serve immediately, directly from the wok. Kottu does not hold well — the roti continues to absorb moisture and softens within 10 minutes of leaving the heat.
What to serve kottu with
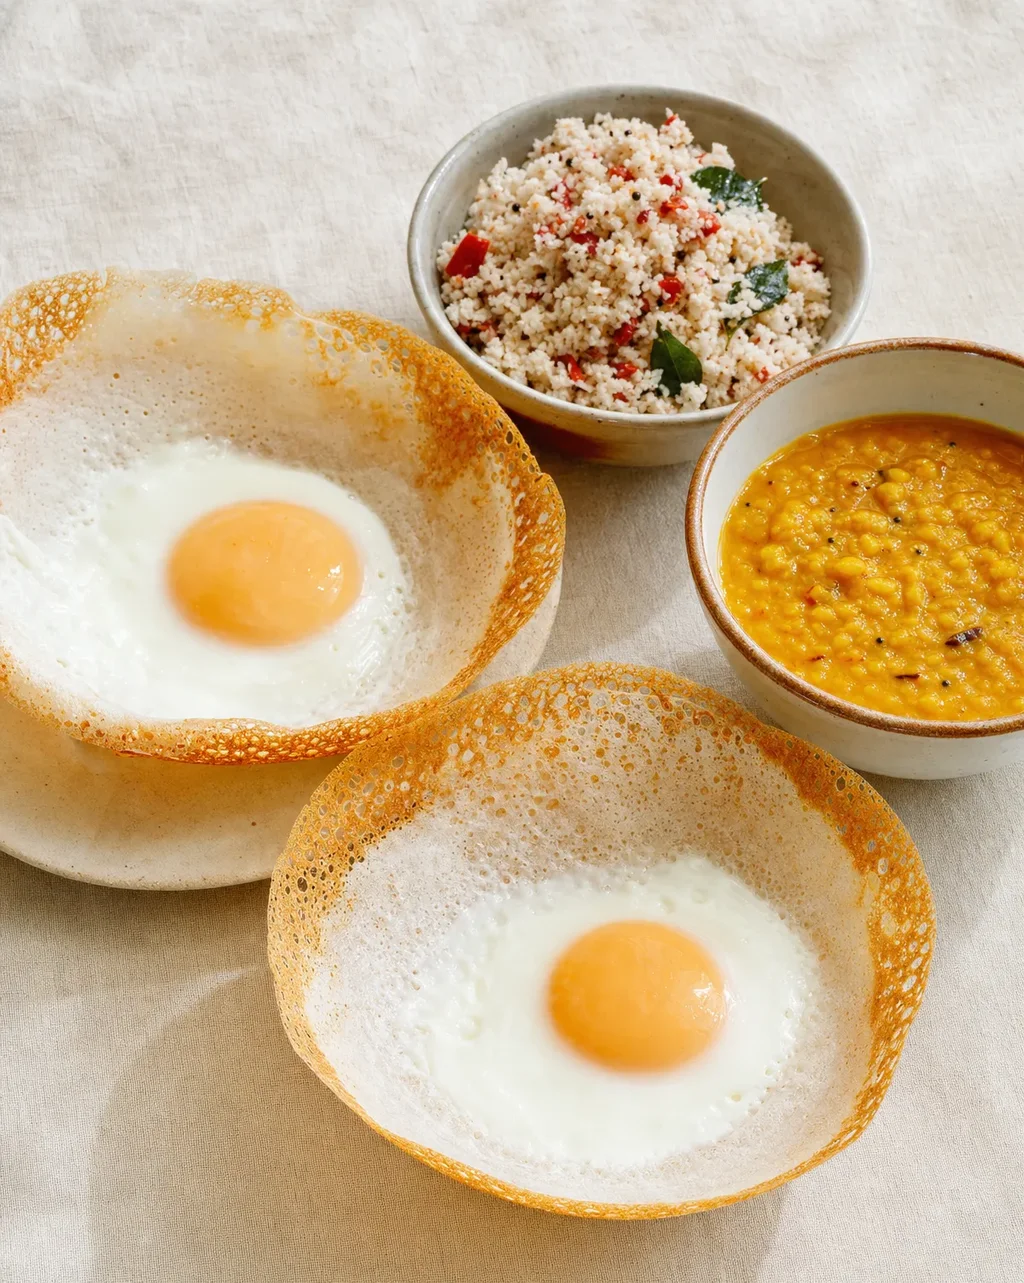
Kottu is a complete meal in itself. In Sri Lanka it is served with a small side of extra curry gravy for those who want more sauce, and occasionally with a wedge of lime. A spoonful of pol sambol alongside adds the coconut-acid-chilli contrast that makes the richness of the kottu easier to eat over a full portion.
It is traditionally eaten at night — after dinner, after drinks, when everything else is closed. It is not a light meal.
Substitutions
No godamba roti: Use frozen paratha cooked and cooled, or any thin flatbread. Avoid thick naan or fluffy pita — the texture is wrong. Thin flour tortillas work acceptably in an emergency. The kottu will taste correct but the texture of the roti pieces will be softer.
No roasted curry powder: Use a combination of ½ tsp regular curry powder + ½ tsp smoked paprika. It approximates the roasted depth without being identical.
No curry leaves: Leave them out. As with all Sri Lankan cooking, dried curry leaves add nothing. The kottu works without them.
No leek: Replace with extra spring onions or thin-sliced cabbage. The leek adds a mild sweetness and bulk — either substitute provides similar bulk with slightly different flavour.
Vegetarian version: Replace chicken with 200g firm tofu, pressed and cubed, cooked the same way. Replace chicken curry gravy with 4 tablespoons of vegetable stock seasoned with roasted curry powder. The result is a genuine vegetarian kottu, not a compromise version.
Storage
Kottu does not store well. The roti absorbs moisture overnight and turns soft. If you must store it, refrigerate in a sealed container for up to 1 day and reheat in a hot wok with a tiny amount of oil, stirring constantly, until hot and slightly crisped again.
Store the cooked godamba roti separately from the kottu if making ahead. Cooked roti refrigerates well for 3 days and freezes for 1 month. Defrost at room temperature before cutting and using.
Love Sri Lankan food?
Check out my complete guide to Sri Lankan home cooking, pantry essentials, and techniques.
FAQ
What is the difference between kottu roti and roti canai? Roti canai is a Malaysian flatbread — the same bread used to make godamba roti in Sri Lanka, brought by South Indian and Malaysian traders. They are the same bread. Kottu roti is a Sri Lankan dish made by chopping cooked godamba roti and stir-frying it with other ingredients. Roti canai is the bread itself, typically served with dhal or curry for dipping. One is an ingredient. The other is a complete dish built from that ingredient.
Can I use leftover curry to make kottu? Yes — and this is traditionally how kottu was invented. Leftover chicken or beef curry works perfectly. The gravy from the leftover curry is the flavour base. Use the meat from the curry as the protein and the gravy as the liquid that coats the roti. The kottu will taste more complex than a fresh-cooked version because the curry has had time to develop depth. Reduce the gravy slightly if it is very thin before adding it to the wok.
Why is my kottu soggy? Three common causes. First, the heat was too low — the roti steamed instead of frying. Keep the wok at maximum heat throughout. Second, too much curry gravy was added — 4 tablespoons is the maximum for 4 portions of roti. More than that and the roti cannot absorb it all. Third, the roti was cut too small — very small pieces absorb moisture faster and turn soft. Aim for thumbnail-sized pieces.
What does kottu roti taste like? Kottu tastes of roasted Sri Lankan spice, savoury chicken curry, slightly charred flatbread, and egg — all at the same time. The texture is the defining characteristic: chewy pieces of roti that have absorbed curry gravy, interspersed with tender chicken and softly scrambled egg. It is not crispy. It is not soft. It is somewhere between the two, and that specific texture is what makes it distinct from any other stir-fried flatbread dish.
Sri Lankan Chicken Kottu Roti Recipe (With Homemade Godamba Roti)
PT30M
PT40M
PT1H10M
Nutrition Facts
Ingredients
- 400g (14oz) boneless chicken thighs, cut into 2cm pieces
- 1 tsp roasted Sri Lankan curry powder
- ½ tsp ground turmeric
- ½ tsp chilli powder
- ½ tsp salt
- 1 tbsp coconut oil
- 3 tbsp coconut oil
- 1 tsp black mustard seeds
- 10 fresh curry leaves
- 2 shallots, finely sliced
- 4 garlic cloves, finely sliced
- 2cm piece ginger, grated
- 2 green chillies, finely sliced
- 1 medium carrot, julienned
- 2 spring onions (scallions), cut into 3cm pieces
- 1 leek, thinly sliced
- 1 tsp roasted Sri Lankan curry powder
- ½ tsp ground turmeric
- ½ tsp black pepper, freshly ground
- 3 eggs, beaten
- 4 tbsp chicken curry gravy (from cooking the chicken above, or leftover curry)
- Salt to taste
Instructions
- Step 1 — Make the dough
- Step 2 — Rest the dough
- Step 3 — Stretch and cook
- Step 4 — Cut the roti
- Step 5 — Season and cook chicken
- Step 6 — Build the aromatic base
- Step 7 — Add egg
- Step 8 — The chopping technique
- Step 9 — Taste and finish
Did you make this recipe?
Tag @asianfoodsdaily on Instagram or leave a comment below!
About Asha
Half Asian, half African cook raised between two food-obsessed cultures. I've spent 10 years learning Asian cooking traditions through family, friends, and thousands of hours at the stove — testing every dish until it works in a standard home kitchen.
Read my full storyRelated Recipes
Sri Lankan Hoppers (Appa) Recipe — Plain and Egg Hoppers
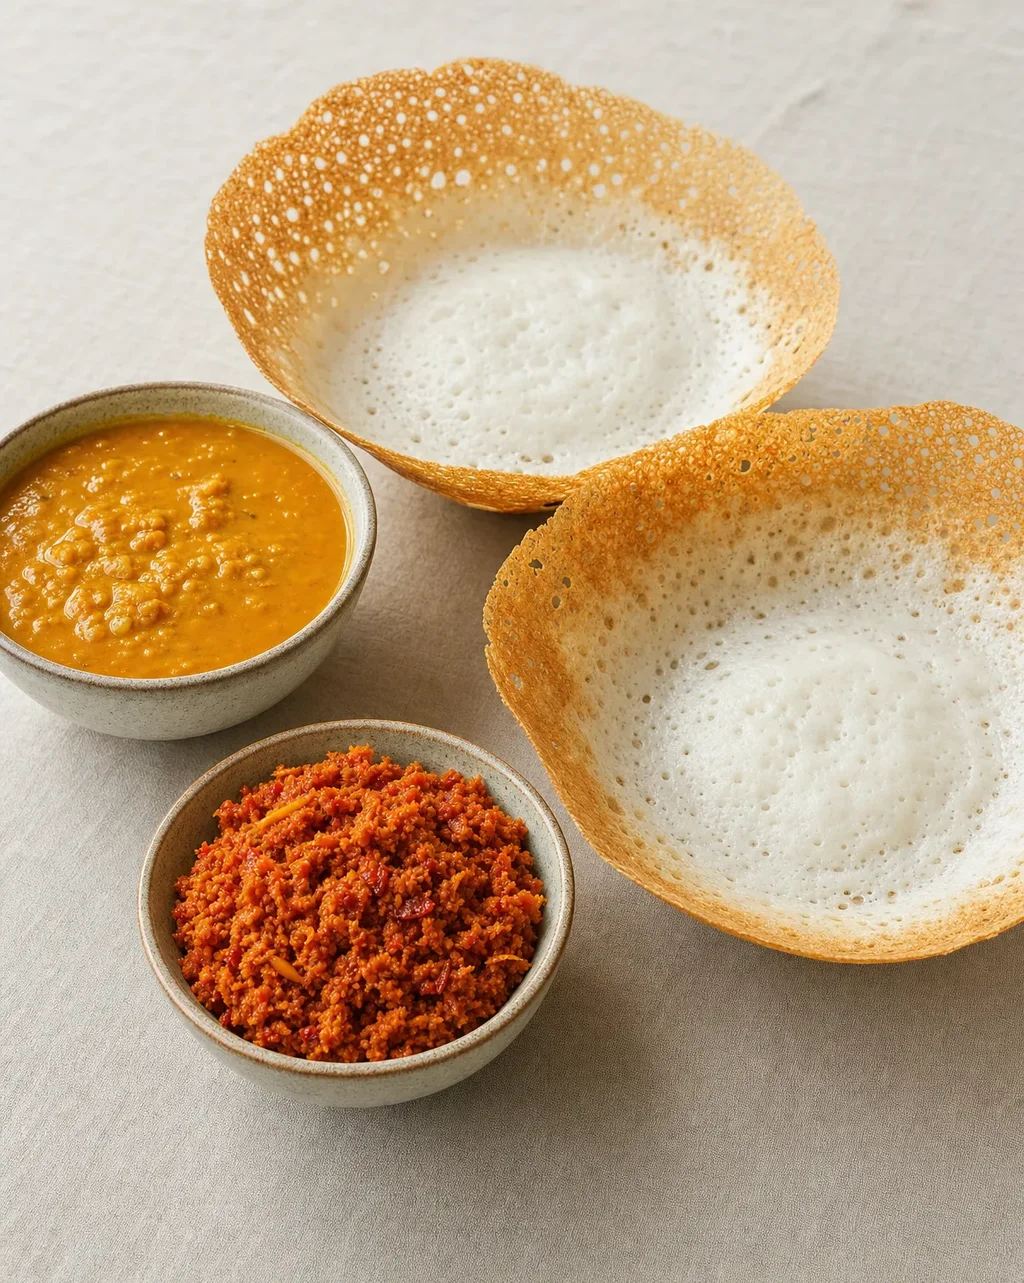
Sri Lankan Pol Sambol (Coconut Sambol) Recipe

Sri Lankan Parippu (Dhal Curry) Recipe
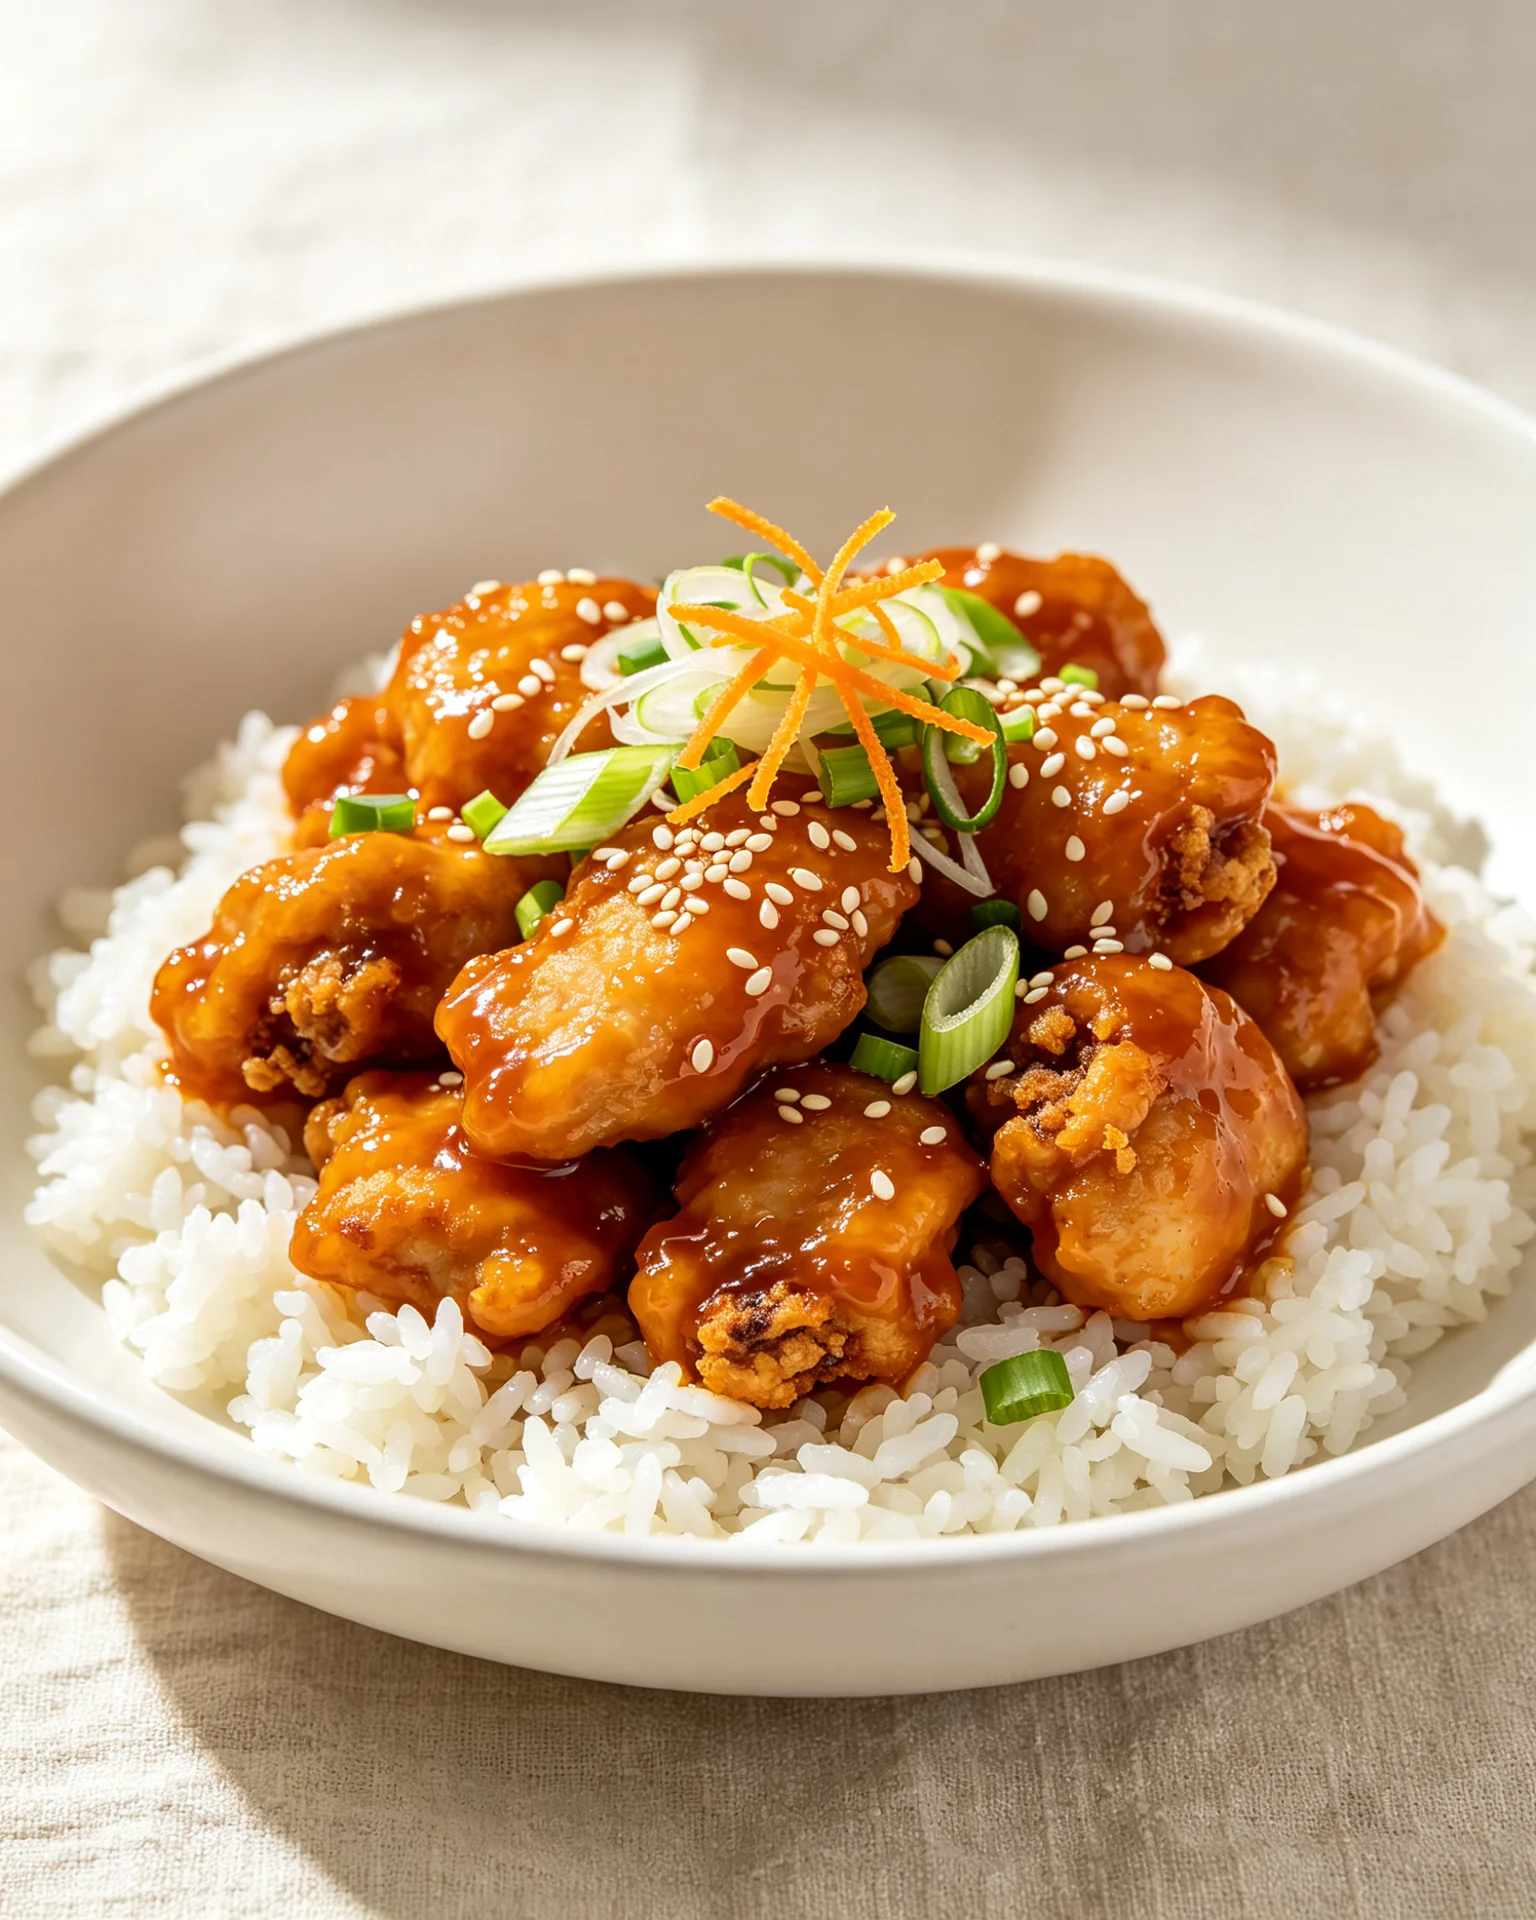
Orange Chicken Recipe

Chicken 65 (The Spicy, Flavor-Packed Dish You Need to Try)

Loading comments...